Java is one of the most popular programming languages in Information Technology. Java is widely used in various areas of Software Development. Below are some simple instructions to install Java.
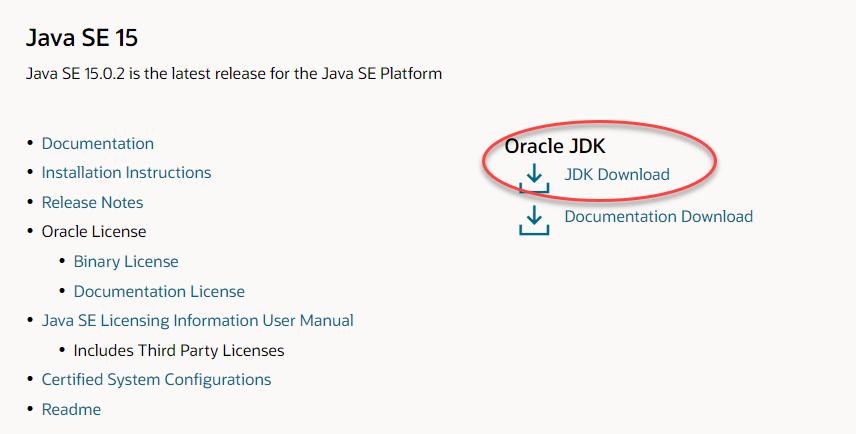
To install JDK, visit https://www.oracle.com/ca-en/java/technologies/javase-downloads.html
Oracle keep upgrading their version of Java, so pick the most latest version, click on the JDK link as shown below
When you click on the JDK link, you will be taken to the installation page. As per the operating system that you are currently use, click on the installation file.
For Windows, Click on exe file, as shown below
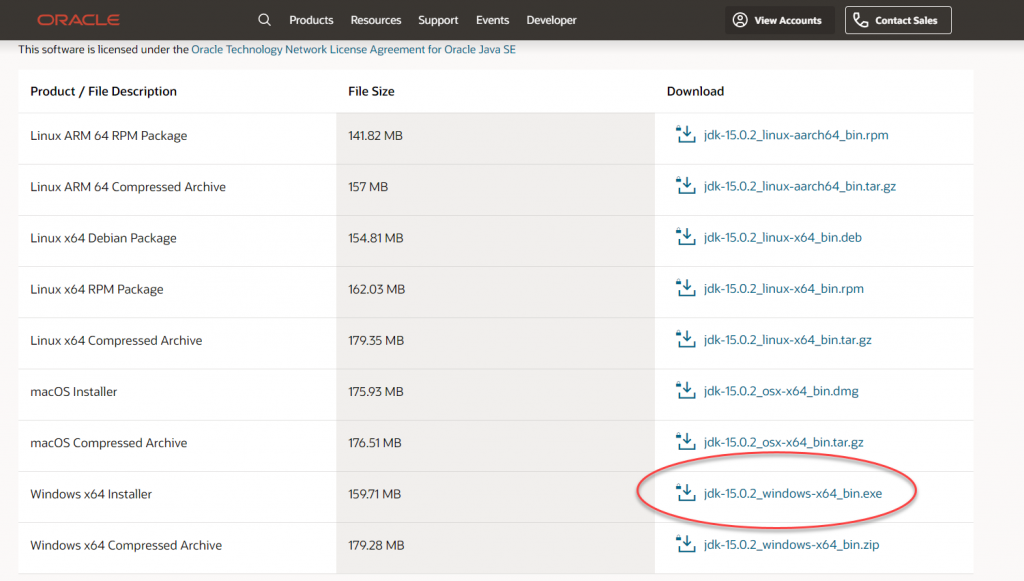
Oracle will want you to register as a user in order to download the file; So just sign up and you will receive a confirmation email from Oracle, and you will be able to download the exe file.
After download the .exe file, go ahead and run it. The setup should be straight forward and you should be able to install Java successfully.
Now in order to make sure your installation has completed successfully, open the command prompt from the windows menu, ie. Click on Windows Icon > Select Windows System > Select Command Prompt, and then type in “java -version” and click enter. This should show the current version of Java installed. Watch the video below if you need direction.
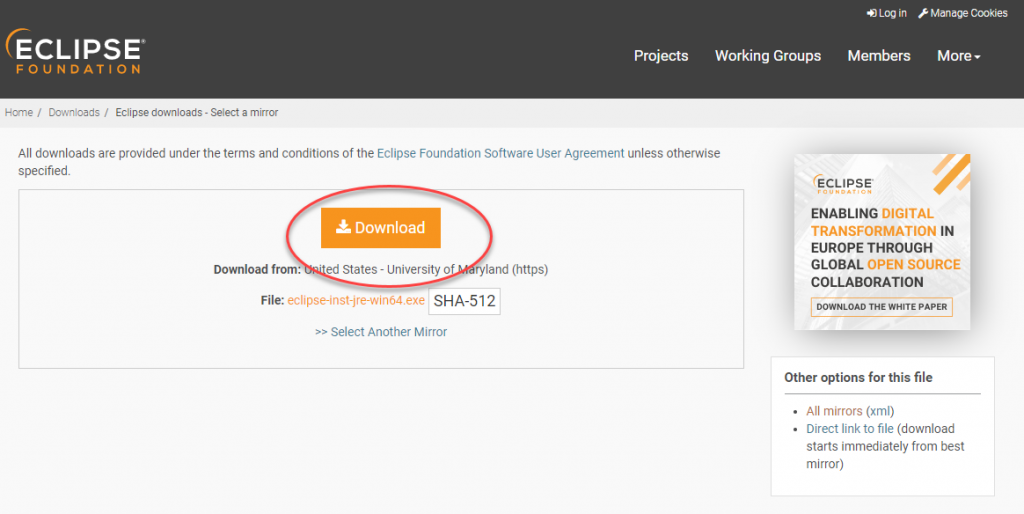
To install Eclipse, visit https://www.eclipse.org/downloads/ and click on the download button. Now this will download an exe file, which you will run in order to install Eclipse.
Now just go to Window Start Button >> Click on Eclipse Folder >> and Run Eclipse
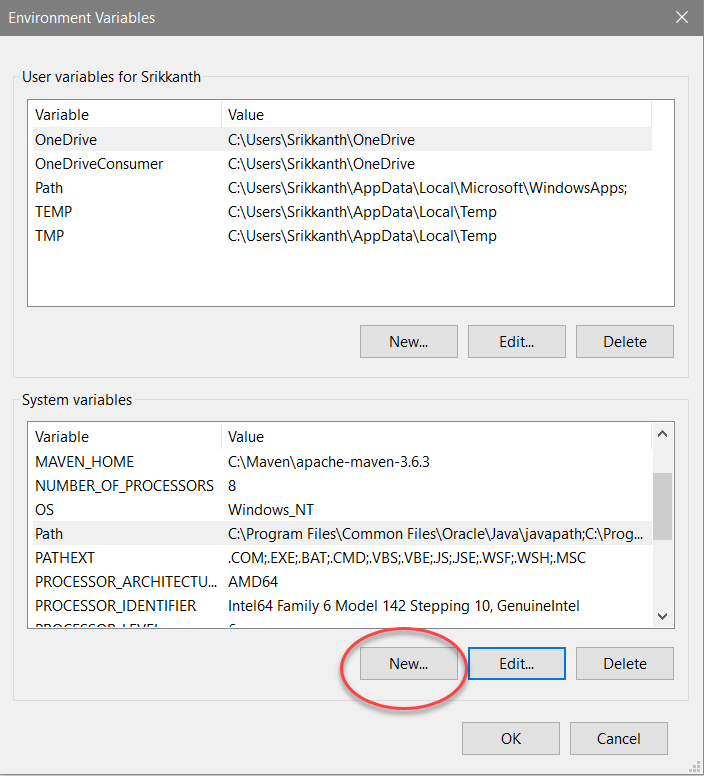
We will need to set up the environment variables in order to point Eclipse to your JDK, here is what you do
Open a Windows Folder >> Right Click on MY PC >> Select Properties >> On the Information Window, click on Advanced System settings >> on the System Properties Window, click on Environment Variables >> This should open the Environment Variables Window
On the environment variables window, click on New
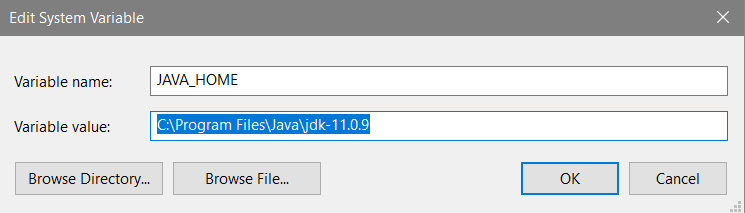
On the Edit System Variable Pop Up, enter the variable name as “JAVA_HOME” and the paste the path where the JDK folder is saved and click OK
Then on the Environment Variables winder, under System Variables select the system variable “PATH”
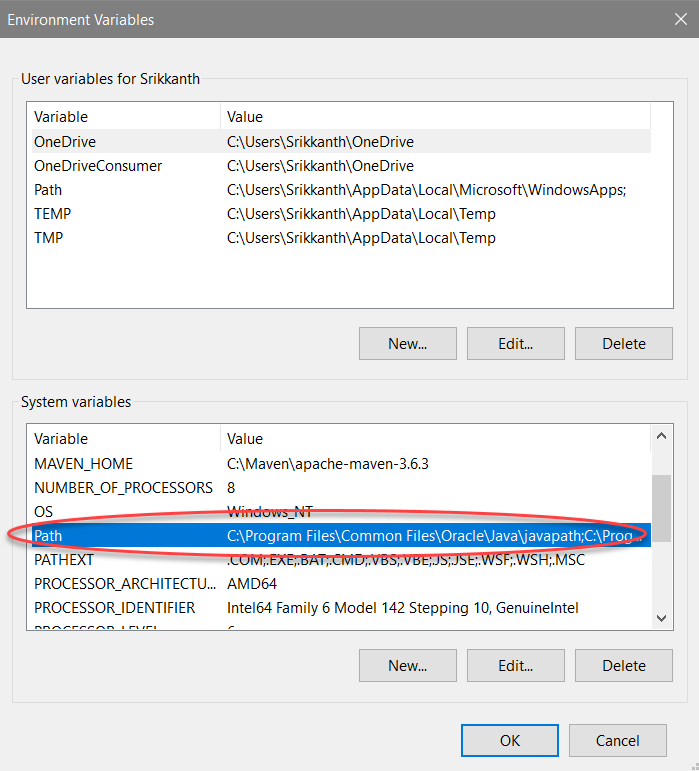
Click on EDIT

Click on New on the Edit Environment Variables, and paste the BIN path, from the JDK folder
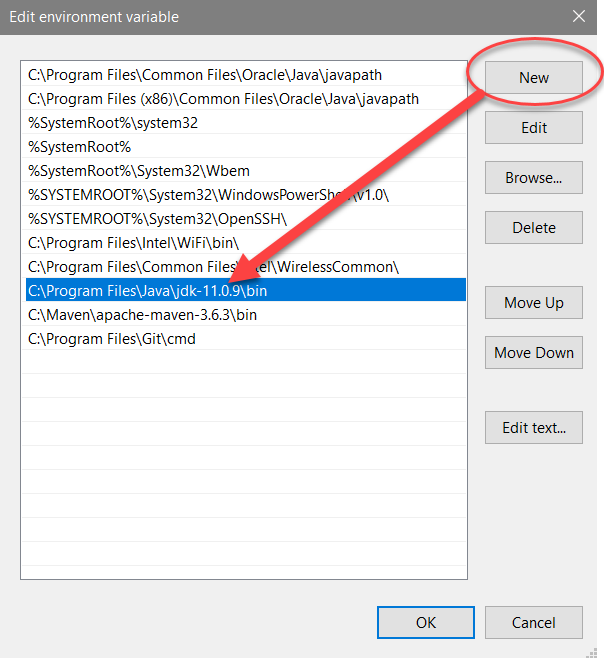
Click on OK and close all windows
Yayy! Now you are ready to learn Java!!
For learning Java, we will need a IDE (integrated development environment). There are many IDE choices available out there, but we will use Eclipse, as its the most popular one
So basically, an IDE is a software application, which we will install. This IDE application will provide us some comprehensive facilities to build code for learning Java, Selenium, Cucumber and much more.
So lets get Eclipse installed. (PS: its pretty straight forward)
First, go to https://www.eclipse.org/downloads/ and click on the Download button

When you click on download button (shown below) , you will download an EXE file ( to your downloads folder). You will need to run this EXE file…. When the installation window pops up, just select next .. next … next!! … to complete the installation

And that’s its, you are good to Go!!
Open Eclipse from your Windows Menu and start learning !!